Text on image: add text to a photo in your browser
Put text on image in the browser: open the picture, choose Horizontal Type (T) and click the canvas. Type the caption, set font, size, color and alignment in the options bar, then export the image to your device.
- 5 font sets
- Shadow and stroke
- Editable text layers
- Nothing to install
- Opens
- JPG
- PNG
- WebP
- GIF
- BMP
- TIFF
What to write on a picture
A caption over a second photo starts with combining two images.
Sale card for a shop
A large price and a short product name, both on their own text layers, so the offer can change without redoing the photo.
Post caption
A place and date in the corner, or a short line across the top; keep the type smaller than the subject.
Job or college application
A name and a reference number on a scanned document, placed clear of the text that is already there.
Holiday card
A greeting over a family photo, with a drop shadow so the words survive a busy background.
How to add text to a photo
Open the picture
Press "Open the editor" and choose a photo, or drag the file onto the canvas. An image from the clipboard can be pasted straight into the document.
Take Horizontal Type (T)
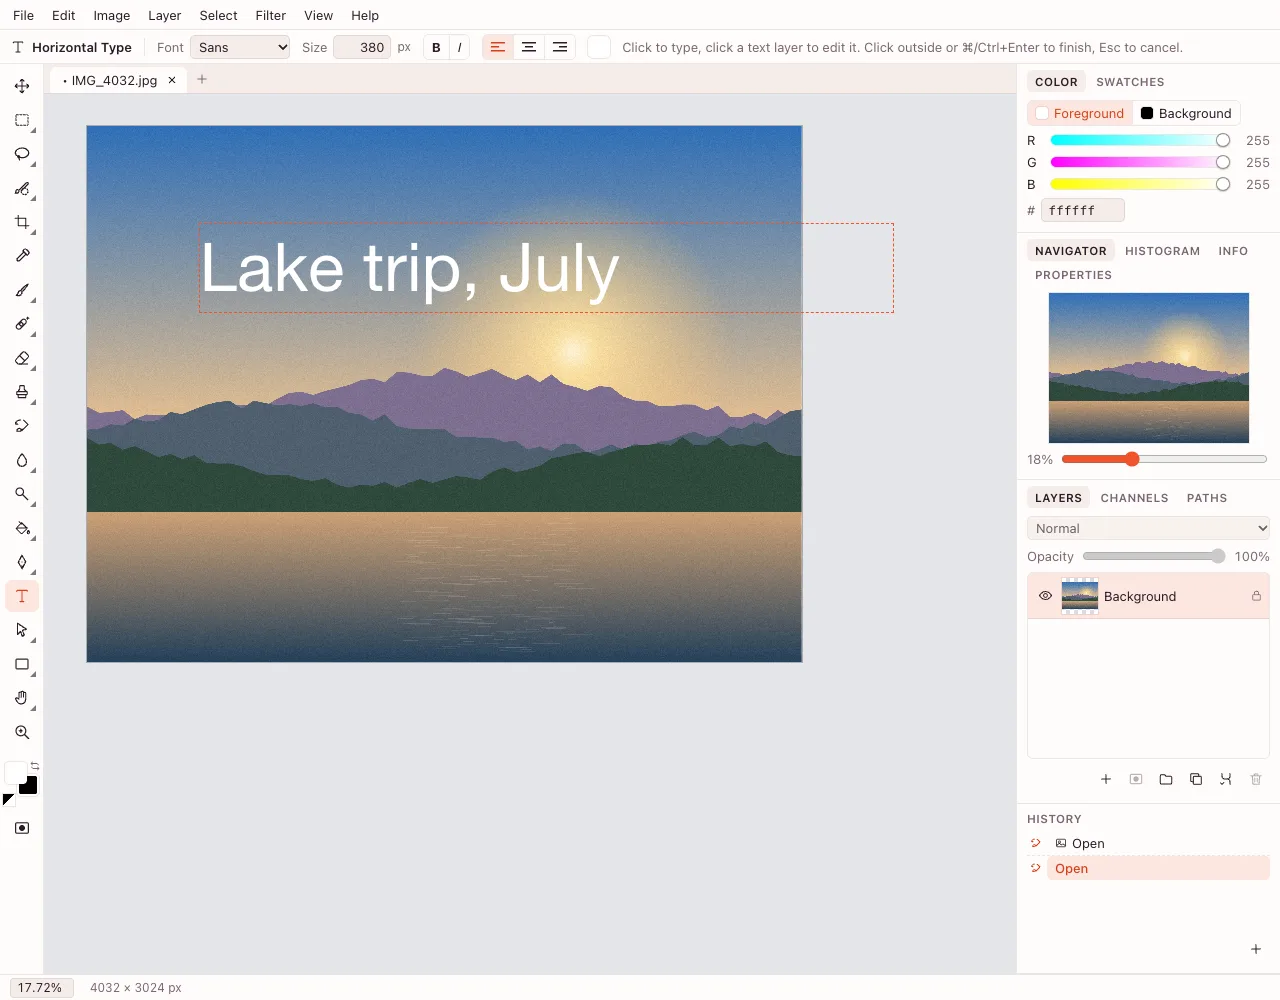
Press T or select the tool in the left toolbar, then click the canvas. The options bar shows Font, Size, Bold, Italic, Alignment and Text color.
Set the type
Five font sets are available: Sans, Serif, Monospace, Rounded and Handwriting. Size runs from 1 to 2000 pixels, alignment can be left, center or right, and Enter starts a new line.
Add a shadow or stroke
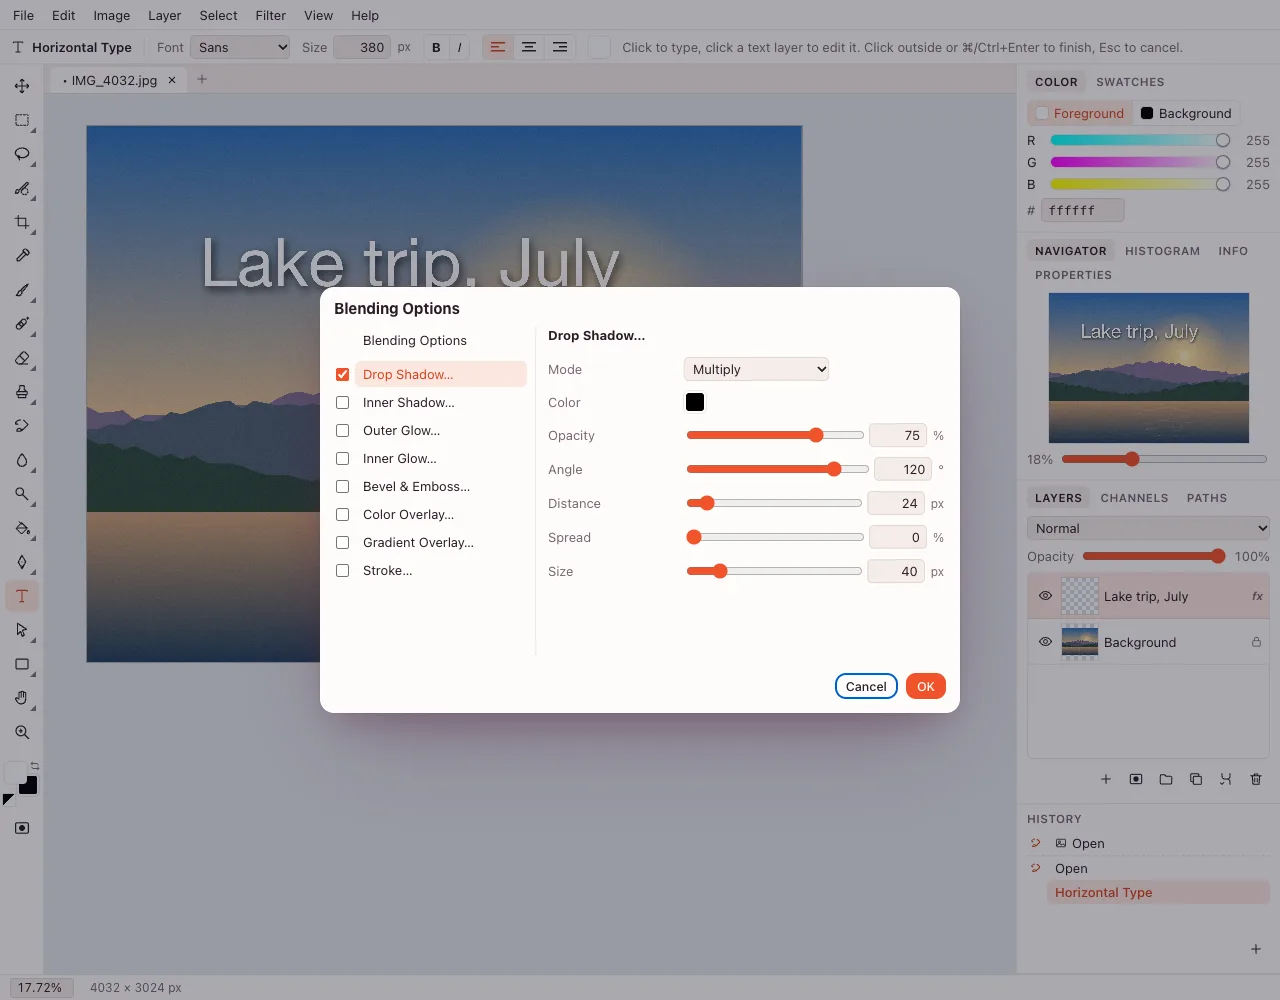
Double-click the text layer to open Layer Style: Drop Shadow… lifts the words off a busy background and Stroke… draws an outline around each letter. The style can be copied to another layer.
Export the result
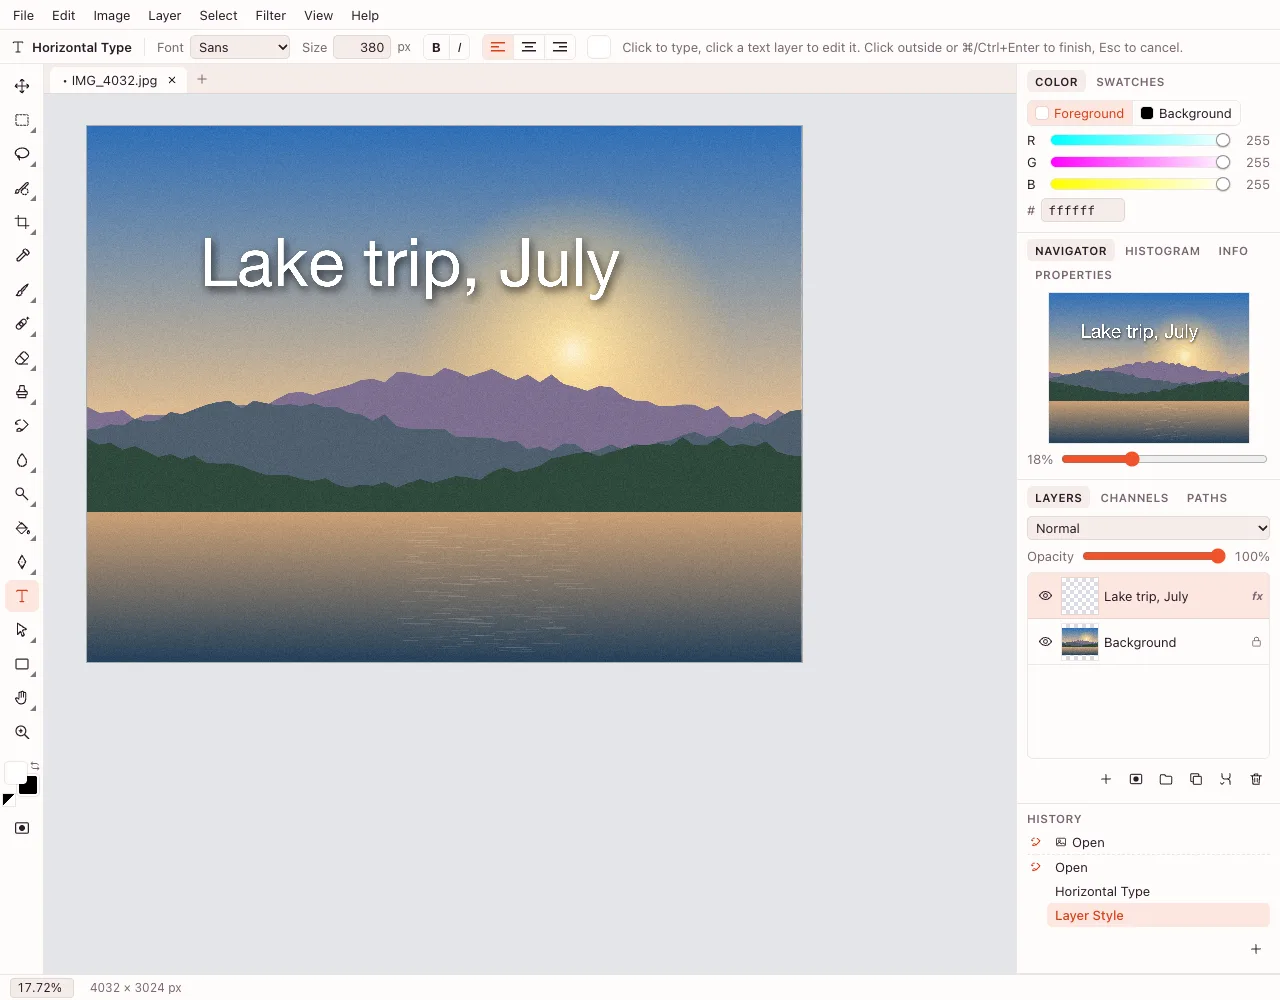
File → Export As… writes PNG, JPEG or WebP. A .photo project keeps the caption as a separate text layer, so it can be rewritten later.
Text on image: font, size and color
Settings apply to the selected text layer or to the next caption you type. Select the layer, change a value, and the words update on the canvas.
| Setting | Options | When to use it |
|---|---|---|
| Font | Sans, Serif, Monospace, Rounded, Handwriting | Headline, caption, handwritten note |
| Size | 1 to 2000 pixels | Large cover or a small credit line |
| Bold and Italic | Toggle separately | Emphasis inside a line |
| Alignment | Align left, Center, Align right | Several lines of different length |
| Text color | Any color | Contrast against the photo |
How do I write on a picture with an outline?
A stroke is a layer style, not a second copy of the words. Double-click the text layer, open Layer Style → Stroke… and set the size, position (Outside, Inside or Center), color and opacity.
Drop Shadow… adds angle, distance, spread and size when letters get lost in a detailed photo. A finished style can be reused through Copy Layer Style and Paste Layer Style.
- Drop Shadow… separates the text from the background
- Stroke… outlines the letters
- Outer Glow… adds a soft accent
- Bevel & Emboss… gives the type depth
How do I add text to a photo on an iPhone?
Open the page in Safari, pick a picture from Photos and tap the T tool. The on-screen keyboard appears after you tap the canvas; drag the layer with a finger, change the size in the options bar, and save the result to Photos or Files.
Can I write on a picture without installing an app?
Yes. The editor runs in the browser on a computer, iPhone, iPad and Android, so nothing is installed and no account is needed to start. A caption can be typed, styled and downloaded in one visit.
How do I edit text after it is placed?
The caption stays a text layer: click it with the T tool to rewrite the words, and the font, size and color settings follow the selected layer. Free Transform (⌘T) scales and rotates the whole block without changing the point size.
Enter starts a new line, ⌘/Ctrl+Enter finishes typing, and Esc cancels. Multi-line text follows the chosen alignment. Layer order is explained on the layers online page.
What is not available yet
- Vertical text and text on a path are not implemented; only Horizontal Type is available.
- Custom font files cannot be uploaded — pick one of the five font sets.
- There is no batch mode: a caption is added to one document at a time.
Formats and saving
Export As… saves PNG, JPEG or WebP. Choose PNG or WebP when the background must stay transparent; JPEG fills transparent areas with white.
A .photo project keeps the caption as a text layer, so it can be rewritten the next time you open it. PSD is not supported.
Is it private?
The photo and the caption are edited in the browser. Cloud saving begins after you sign in and follows the edition's GDPR rules; downloading the image to your device needs no account.
Questions and answers
Support: [email protected]
How do I add text to a photo?
Open the picture in the editor, press T and click the canvas. Type the caption, then set the font, size, color and alignment in the options bar. Export the result with File → Export As… as PNG, JPEG or WebP.
How can I write on my picture?
Choose the Horizontal Type tool, click where the words should start and type. The caption becomes its own text layer, so it can be moved, restyled or rewritten at any time without touching the photo underneath.
How do I add text to photos on an iPhone?
Open the page in Safari and pick a photo from your library. Tap T, tap the image and use the on-screen keyboard. Drag the caption with a finger, adjust the size in the options bar, then save the file to Photos or Files.
How do I add text to a photo on an iPad?
The page works the same way in Safari on iPad. Load a picture, tap the T tool and type; the larger screen leaves more room for the options bar and the Layers panel, which makes long captions easier to position.
Can I put an outline around the text?
Yes. Double-click the text layer, open Layer Style → Stroke… and set the size, position, color and opacity. The outline wraps the letters while the caption stays editable, so the words can still be changed later.
Can I change the caption after saving?
In a .photo project, yes: the text stays on its own layer and can be rewritten when the file is opened again. A PNG, JPEG or WebP stores a flattened picture, so the words become part of the image.
Can I upload my own font?
No. The editor offers five font sets — Sans, Serif, Monospace, Rounded and Handwriting — and custom font files cannot be added. For most captions, covers and sale cards one of these sets is enough.
Can I add vertical text or text on a path?
Not yet. Only Horizontal Type is available; vertical layout and text that follows a curve are not implemented. The whole caption can be rotated with Free Transform, but every letter stays in a normal line.
Is it free, and is there a watermark?
The editor is free and adds no watermark. Start without an account; sign in only if you want cloud saving. The finished image can be downloaded to your device without signing up.
Related tools
Layers online
Build a photo from layers, groups and masks, and keep them in a .photo project.
Combine two images
Place a second photo on its own layer and blend it into the first.
Online photo editor
Edit photos in your browser: layers, masks, brushes, retouching, adjustments, filters and text.
Crop photo
Crop a photo to the ratio you need and download it without leaving your browser.
Resize image
Resize an image to exact pixels or a percentage and download it from your browser.
Blur background
Blur a whole photo in one step, or blur only the background in the editor with a selection and a blur filter.
Black and white filter
Convert a colour photo to black and white in the browser, then download it or fine-tune the tones in the editor.
Rotate image
Rotate or mirror an image in your browser and download it in a few clicks.
WebP to JPG
Convert a WebP or PNG image to JPG in the browser and download the file to your device.
Text on image: add text to a photo in your browser
Type a caption on a photo, style it, and save the image.
Open the editor